Making Kombucha at Home: Instruction From Scratch
-

In recent years, kombucha, a fermented tea drink that has been used for centuries and originated in the north-eastern region of China as a therapeutic remedy, has become very popular, spreading rapidly throughout Europe until World War II. Kombucha is made by fermenting sweet tea with a culture of bacteria and yeast, resulting in a drink with antioxidants and probiotics. Although you can easily find them in grocery stores or cafés, making kombucha at home is a very interactive and easy experience. Not only is it a fun and rewarding DIY project, but it is also an opportunity to make a drink to your taste. In this post, we will describe the steps from scratch, but before we start the process, let's discuss the most important things you need to start making kombucha.
Ingredients:
- Tea: Black tea is the most common choice, but other teas made from the Chinese tea tree or combinations of the two are also suitable, but it is important that the tea is unflavoured. Please note that herbs such as mint, thyme, etc. are not traditional teas and are only recommended to be used with traditional teas for various flavours. Kombucha fermentation requires nutrients that are found in traditional teas, so fermenting only with herbs risks damaging the fermentation and the tea fungus.
- Sugar: Cane or beet sugar is preferred. You can choose different refinements of sugar, but we do not recommend very dark, unrefined sugar, as the molasses in it can inhibit fermentation and harm the tea fungus.
- Tea fungus, known as SCOBY (symbiotic culture of bacteria and yeast): From a reliable source or grow your own
- Starting fluid: Usually the previous batch's kombucha
- Water: It is important that water is chlorine-free
- Various additives such as fruit, herbs, or spices that give the drink a special flavour
Tools:- Large (preferably glass) container: During primary fermentation
- Fabric: Paper towel or clean cloth with a rubber band
- Fermentation vessels: Bottle with sealed (ceramic) stoppers for secondary fermentation; funnel for pouring kombucha into bottles
- Teapot for attracting tea and bowl for melting sugar
- Spoon: For stirring
Production Process:- Prepare the tea: Boil the water and pour it over the tea leaves. Steep for about 10 minutes, then strain the tea to ensure no tea leaves remain in the liquid. Stir in the sugar until it is completely dissolved. Allow the tea to cool to room temperature, or add cold water to cool the tea, so you don't have to wait.
- Add the tea mushroom: Transfer the cooled tea into a glass container and add the mushroom along with the original liquid. The starting liquid should be used for 1/10 of the starting liquid. For example, if you ferment in a 3-litre vessel, you will need 300ml (glass) of kombucha.
- Cover and ferment: Cover the container with a cloth secured with a rubber band. Place it in a warm, dark place, preferably at a temperature of 20-28°C, and leave it to ferment for 6-8 days. Remember to taste it periodically to check if the acidity has reached the desired level.
- Secondary fermentation: After the primary fermentation, you can flavour the kombucha with fruit, berries, or your favourite spices. For more information on flavoring kombucha with berries or juice during the secondary fermentation, please read our article. Pour the liquid into the bottles, leaving some space at the top. Seal the bottles and leave them at room temperature for an additional 1-3 days to allow carbonation to develop. Be sure to gently open the bottle from time to time to monitor the gas levels. Once you are satisfied with the carbonation level, the secondary fermentation is complete, and you can transfer the bottles to the fridge. Please note that as the kombucha cools, carbonation will be less active - this is normal.
- Cool it down and enjoy!
After the secondary fermentation, store the bottles in the fridge to slow down fermentation. When you want to taste your homemade kombucha, remember to open the bottle slowly to release the carbonation, then pour it into a glass and enjoy your homemade kombucha!Professional Advice:
- Keep equipment clean to avoid contamination
- Try pre-fermenting with varietal teas, which will give your kombucha an even more unique taste. You can find our recommendations here.
- During the secondary fermentation, experiment with different flavours such as berries, fresh fruit juices, and spices. During secondary fermentation, be careful with the bottles and do not overfill them in a warm environment, as too much pressure may build up, and they may explode.
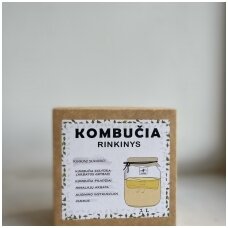
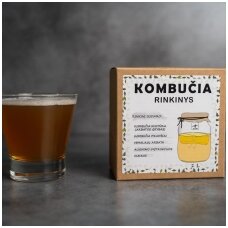
Making kombucha at home is not only a delightful and health-promoting hobby, but also an opportunity to unleash your imagination by experimenting with flavors. By following the steps described in this post and conducting experiments, you can enjoy the pleasures of homemade kombucha at your convenience. To start your kombucha-making journey, you can explore "Tealure", where you'll find not only ready-made kombucha but also kombucha-making kits. If you're looking for a different taste experience, you can try Jun Kombucha or the Water Kefir Kit. Perhaps you already have experience in fermenting kombucha and want to make 3 liters of this drink at once? Consider using a tea mushroom that can yield plenty of homemade kombucha in just one week. So, roll up your sleeves and embark on an aromatic fermentation journey!


